Showing posts with label Creative Team. Show all posts

Thursday, February 14, 2013

Black Velvet Extras

Hope that you like this set of Extras - the kit is by Gemini Creationz and is called
TRUE BLOOD - you can grab it here

Click on the tags to get them at their full size and save them to your pc
Do not alter or claim as your own work
Thanks


Tuesday, July 31, 2012

KiwiFire Storm POISON IVY Extras

One more set of Extras for you ... this time using the awesome and fabulous artowork of KiwiFire Storm.
You can get this tube at The PSP Project - along with all of Brian's other amazing art
The tube is called POISON IVY and you can get it here

Please save to your own computer - don't link to the images when using - thanks


VeryMany Love Extras ♥

Starting the week off with some Extras using the awesome PrePaid tube by VeryMany at the PSP Project
Here is a preview of the tube
You can get the tube here
But you better hurry - it won't last long

Here are the extras - as always, enjoy and remember the rules on snagging! ♥


Thursday, July 26, 2012

Ed van der Linden SENSATIONAL (PTU)

This tutorial was written by me on July 26th 2012
And resemblance to other tutorials out there is purely coincidental.
Do not copy, rip apart or claim as your own work.
This tutorial was done in PSP 9 but should work in all versions.

SUPPLIES
This tube is by Ed van der Linden called BABE 02 and is available at the PSP Project
Kit is called Summer Loving by Sam's Scraps and is part of the Starter Pack at the PSP Project
Filters - Xero Fritillary, Eye Candy Gradient Glow & HSB Noise & Glass, PentaCom Dot & Cross
Fonts - Pussycat Snickers and AL Script Hand

TUTORIAL
Open a 650 x 650 transparent canvas.
Using your preset shape - draw out an oval/circle with a color that matched your tube.
Apply Eye Candy HSB Effect - default settings, only altering the Width and Height to approx 100. Choose Random seed until you get the hue pattern you like.
Now go to Effects/Texture Effects/Blinds - and apply settings as below
Apply a Gradient Glow - FAT  and then Medium in a color of your choice.

Back to your Preset Tool Shape.
Choose a color from your tube - and draw out a rectangle - check my tag for size guides.
Apply PentaCom Dot and Cross effect - default settings.
Add the same Gradient Glows that you applied to the oval/circle.

Once again - Preset Tool shape and draw out a small circle - check my tag once again.
Duplicate and Mirror, then merge layer down.
Apply HSB Noise to these small circles, and same Blinds effect, but untick the Horizontal box.
Copy and paste your tube - resizing to taste - and place over one of your circles.
Duplicate and mirror, then merge layer down.
Choose your Magic Wand ... and move back to the small circle layer, and click anywhere outside the circles - the marching ants should now be showing up. Move back to tube layer, and hit delete. Your tubes are now trimmed and sitting perfectly on your circles.
Change Blend to Luminance Legacy, lower Opacity to 62.
Merge this layer down - your circle and tube layers are now 1 layer.
Add Gradient Glow if desired.

Preset Tool once again - this time using the Rectangle shape.
Draw out a small rectangle in your color of choice - check my tag for sizing.
Apply HSB Noise if desired and then Xero Fritillary with these settings
Add Gradient Glow as before.

Now for the Kit Elements
Element - Feather - copy/paste, resize by 66%. Move up and to the right slightly. Duplicate, Mirror and move this feather down and to the left. Adjust/Hue & Saturation to match your tube.

Element - Dancer Leaf - copy/paste, resize by 66%. Adjust Hue & Saturation as before. Move to the right, Duplicate and then Mirror. Merge Layer down, then duplicate Layer and Flip. Merge this layer down, and then drag your Leaf Layer so it is your bottom layer.

These are the other Elements I use - put your own stamp on this tag - you don't have to use the same ones.
Element - Dancer Butterfly
Element - Dancer Ribbon 5
Element - Dancer Flower 3
Element - Dancer Champagne Glass

Now add your tube - resize by 66% and place in the middle of your tag.

Using your Pussycat Snickers font, color of choice - size 90, type out the word
SENSATIONAL 
Place this down towards the bottom of your tube.
Apply HSB Noise, then Eye Candy Glass, then Gradient Glow as before.
Copy and Paste Element Dancer be fabulous wordart, adjust hue and saturation.
Add a Gradient Glow if desired.
Copy and Paste Element Dancer Star Border - resize, and adjust hue/saturation.
Add your copyright information, making sure it can clearly read
Add your name in the AL Script Hand

Save as a PNG File - and you are done

Monday, July 23, 2012

Zindy WHERE IS LOVE - FTU

This tutorial was written by me on July 20th 2012
and is entirely my own creation
Any resemblance to other tutorials on the net is
purely coincidental.
You are welcome to link back to the tutorial if using in Forum Challenges.
Do not claim as your own work, rip apart or post tutorial elsewhere.

SUPPLIES
Another awesome Zindy tube called SASSY RED which you can buy here
FTU Kit by Gothic Inspirations called The Darkest Night
Filters : Eye Candy Gradient Glow and Xero Porcelain
Fonts used : Dusty Rose and Century Gothic.

TUTORIAL
Open a 650 x 650 transparent image.
Open up your tube - leave to one side for now.
Open your kit and choose element MESH - copy and paste as new layer, resize by 66%. Move this up and to the right. Duplicate layer, Mirror, Flip - merge layer down.
Choose your preset tool and select Circle/Elipse - Choose White as your background color.
Draw out a large circle. Apply Effects/Texture/Blinds with the following setting
Width 3 Opacity 29 Color Black, Light from top left

Now choose a color from your tube - and draw out a smaller circle - move to the left.
Paste close up onto the circle - delete any overhang
(You should know how to do this by now)
Adjust Opacity to desired strength.
Now apply Xero Porcelain with default settings - adjusting the BLUE to 76
Move back to your circle now and add a Gradient Glow if desired. (Fat/White and then Color/Medium)

Back to your Preset Shape and choose a heart shape - draw out a small heart in your color of choice, then draw out a few more hearts scattered over the right hand side of the large White circle shape. Don't make them all the same size - and keep a scattered effect with them. Convert to Raster Layer, apply a drop shadow, and Xero Porcelain if desired.

Copy and paste your tube - use my tag for reference.
Resize by 85% - Adjust Sharpness.

Now - start adding your elements
(Adjust the element color to match your tube - I used HUE 225 SATURATION 80)
Moon - Copy/Paste, resize by 66% - move this layer down below your circle shapes - and to the left.
Lamp - copy/paste, resize by 33% - move to the right.
Fern - copy/paste, resize by 66%, and move this down behind your tube.
Rose - copy/paste, resize by 33% - move to right of your tube, duplicate and mirror the rose.
Scatter - copy/paste, resize by 66% - place where you like on the tag.
Beads - copy/paste, resize by 66% and place this so it sits along the bottom of your tube.
Sparkles - copy and paste. This is your top layer now - place as desired.

Now choose a color to match your tag, and the Dusty Rose Font
Type out WHERE IS LOVE? - and place at the bottom of your tag.
Add any desired effect.

Choose Century Gothic Font - and type out your name, in size 16, repeating 4 or 5 times.
Add a Gradient Glow.
Add your Copyright Information and save as a PNG.

Thursday, July 19, 2012

Zindy COMFORT - FTU

This tutorial was written by me on July 18th 2012
Any resemblance to other tutorials out there is purely coincidental.
Do not rip apart, or claim as your own work.
Provide a link back to the blog if using this tutorial in forum challenges

SUPPLIES
The tube is new from Zindy called SLEEPY TIME and you can get it here
Elements (if these are yours please let me know and I will credit)
Mask of Choice
Filters - Eye Candy HSB Noise and Gradient Glow
Fonts - P22ZanerFour (Name) and Verdana (©)

TUTORIAL

Open a 650 x 650 transparent Canvas, and open your tube in PSP as well
If you want to apply a mask ... now is the time to do it.
Floodfill with a color of choice from your tube - and apply your mask.
Merge Group.

Add a new layer - and using your Preset Shapes Tool (Circle) with your color of choice, draw out a large circle. Now apply HSB Noise with the following settings
Now take your close up tube and paste on to the circle.
Using your magic wand, move down to the circle layer, and click out side the circle and you will have the 'marching ants' show up.
Now move back up to the tube layer and hit delete.
You have now just trimmed your tube, so it sits perfectly inside the circle. Adjust the tube opacity to suit your taste.
Adjust the Blend Mode on this layer to Luminance, and merge this layer down. (Circle and tube layer are now 1 layer)
Add a Gradient Glow - I used Fat (white) and then Medium (purple) - play around until you get the effect you like. Then move this circle layer to the right of the tag.

Back to your Preset Tool - and this time use the rectangle shape and color of choice.
Draw out a small rectangle shape (look at my tag for reference)
Apply the same HSB Noise Effects and also add Blinds Texture Effects
Once again - copy your close up tube and paste as new layer, positioning over the rectangle shape.
Trim your tube as before, change the Blend Mode to Luminance, and the Opacity to your preference, then merge down. Move to the left of the tag.
Add Gradient Glow like before - then duplicate the layer and Mirror the image.
Now move it back to the left, moving down to the left slightly.

Add your tube - sitting in the centre.
Add a drop shadow.

Back to your Preset Tool - rectangle shape.
Draw out a narrow rectangle in color of choice. Apply HSB Noise and a Gradient Glow.
Now change your background color to White, and draw another rectangle, smaller than the first one.
Add a Gradient Glow.

Add your Wordart so it sits over the rectangles - add a Gradient Glow and Drop Shadow.
Add your Corner roses - colorising to match your tube/tag
Add the Heart Accents either side of your tag, colorising to match the tube/tag
Add your Copyright Information, and your name, and save as a PNG File


Monday, July 16, 2012

Zindy SAY A LITTLE PRAYER - PTU


This tutorial is entirely my own idea and any resemblance to
any other tutorial on the web is purely coincidental.
Do not copy, translate or clain as your own work.
All my tutorials are © protected.

SUPPLIES
A new tube from Zindy called Little Prayers which you can buy at the shop here
Kit I used is by Thaliris called Pink Garden
(link to be added)
Mask of choice
Filters : Eye Candy HSB Noise
Fonts : Saginaw Bold and Verdana (©)

TUTORIAL
Open a 650 x 650 transparent Canvas
Flood fill with a light grey color and apply your mask. Merge Group

Open your kit and use the following elements
Element 42 - Grass - copy/paste and resize by 27% - move to the left. Duplicate/Mirror.
Element 08 - copy/paste and resize by 22% - move to the left.
Element 49 - copy/paste and resize by 22% - move to the right and down to the bottom of the tag.
Element 41 - copy/paste and resize by 22% - move to the left of the tag.
Element 05 - copy/paste and resize by 22% - move to the right of the tag.
Feel free to add any wordart to this scroll page.
Element 01 - copy/paste and resize by 22% - resize again if needed. Move this to the left.
Element 03 - copy/paste and resize by 22% - move to the left of the tag.
Element 04 - copy/paste and resize by 22% - move to the left of the tag and have this sit in front 
of the flower.
Element 36 - copy/paste and resize by 22% - and move this down towards the bottom of the tag.

Now add your tube - resize and place her in front of the scroll (Element 05)
Element 45 - copy/paste and resize. Move to the left of the tag.

Now add the wording I SAY A LITTLE PRAYER in your font of choice.
Add your Copyright Information.
NOW - go to IMAGE/GREYSCALE and apply.

Right Click on the top boarder of your tag - and Copy Merged.
Paste this as a new layer - the top layer - lining up as close as possible but it doesn't have to be exact.
Go to ADJUST/BLUR/GAUSSIAN BLUR with the setting at 6.
Change the Blend Mode to OVERLAY and lower the Opacity to 38.

Apply Eye Candy HSB Noise with these settings

Now is the time to add your name ... when done, save as a PNG File.


Friday, July 13, 2012

Zindy - ANGEL WHISPERS - PTU

This tutorial was written on July 13th 2012 and is entirely my own creation.
Do not claim as your own, rip apart, translate or post this tutorial elsewhere.
You are welcome to post a link if you use this tutorial in Forum Challenges.

SUPPLIES

Pink Angel Collection - Tube and Kit that is available here at Zindy's Store

Fonts used are CK Blake and CK Bloom

TUTORIAL

Open a 650 x 650 transparent canvas.
Copy and Paste Element PA Cloud - resize by 55% - move this up to the right of the canvas.
Duplicate/Flip/Mirror and position on the bottom left of the canvas.

Copy and Paste Element Frame 2 - resize by 55% and move up and to the left.
Duplicate/Mirror and move down slightly.
Merge Layer down - your frame layer should now look like this
Now take your Magic Wand - and click inside the frames - go to Selections/Modify/Expand by 10
Add a new layer below the frame layer, and flood fill with a color to match the frame or tube.
I then added Eye Candy HSB Noise effect and Blinds Texture. This is optional.

Copy and paste your tube twice ... moving these tubes so they show through the frames. Once you have them positioned as you like ... cut/delete the overhang showing beyond the frames.

Copy and Paste the following elements - resizing to taste - most of these were resized to 44%
Element PA Flower 1 - resize and move to the bottom left corner of the top frame. Duplicate and mirror and move down to the bottom left hand corner of the bottom frame
Element Card Heart - resize and move so this lays between the 2 flowers.
Element PA Light - resize and move down to the bottom left corner of the canvas.
Element PA Jar - resize and move so this sits in front of the flowers and heart.
Element PA Stickbow - resize and move so it sits behind the jar.
Element PA Card - resize and move so it sits in front of the jar and to the left slightly.

The rest is up to you - make this tag unique to you by adding whatever other elements you like. If adding some of the ribbons, post them as layers below the frames and have them sticking out slightly.

Now copy and paste your tube - and move to the right. Add a drop shadow - these are the settings I used

Now copy and paste Element PA Flutters - resize to taste.
I mirrored this element - and moved it to the left but still have some of the butterflies
laying across the Angel Tube.

Now using your font of choice - type out ANGEL WHISPERS
I used CK Bold Blake in Size 48, then add a Fat Eye Candy Gradient Glow in White, and then a Medium Glow in Pink (size 3)
Move this wording so it sits at the bottom of the Angel Tube.
Add your Copyright Information, and your name and save as a PNG File
You are done ... 

Tuesday, July 10, 2012

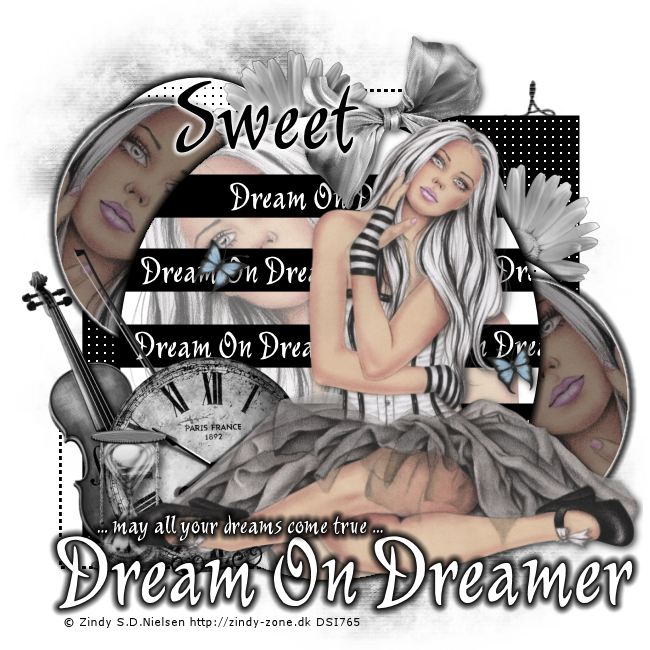
ZINDY Dream On Dreamer Extras

Again ... the wonderful art of Zindy
This tube is an Exclusive at Dreamscape Imaging which you can buy here

Enjoy the extras - and remember the rules
Snag away, but do not alter in any way or claim as your own work


Monday, July 9, 2012

ZINDY Haven's Fairy - PTU


This tutorial is entirely my own idea.
If this resembles any others out there, then it is purely coincidental.
Do not rip apart, claim as your own, or copy in any way.

SUPPLIES
Tube is from Zindy called Cherry Fairy and you can get it here
Kit is called Heavenly Place by Albina which you can buy here
Mask of Choice ... if desired
Font : Verdana (Copyright) & Before The Rain (Name)

No outside Filters used.

TUTORIAL

Open a 650 x 650 Transparent Canvas

Now open your kit and use the following elements
# 60 Waterfall - Copy and paste as new layer. Do not resize
#46 Flower Corner- copy/paste - resize by 44% and move to the bottom right
# 66 Flower Arch- Copy/paste - do not resize. Move down below the waterfall layer
#47 Palm Frond - Copy/Paste - resize by 44% and move down below waterfall layer, moving to the right. Now duplicate and mirror image and move up slightly.
#14 Oyster Shell & Pearl - Copy/Paste and resize - move down to the left slightly
# 24 - Copy/Paste and resize - move down and to the left, sitting next to the Oyster Shell
# 23 - Copy/Paste and resize - move to the left.

Add your tube - no need to resize. Move her down a couple of layers, so it looks like she is
standing in the flowers.

Add your Copyright information CLEARLY - and also add your name, in your font of choice.
Save your tag as a PNG File and you are done.

Friday, June 29, 2012

Sultry Nights Cluster Freebie

Time for another Cluster Freebie.
This time I used the kit SULTRY NIGHTS by Inzpired Creationz which you can purchase at Scraps and the City here
Nicky's kit's are all on sale now - 38% off ... so make sure you check out her other kits

Here is the preview of the Cluster - there is a mask background on a separate layer

And here is my finished tag with the beautiful artwork of Very Many
Happy Tagging :)

PinUp Toons Pretty Little Garden

This is my first tag made for OScrap Candy Shack.

I chose to use the gorgeous kit called PRETTY LITTLE GARDEN by Creative Scraps by Crys
which you can buy here
Here is a preview of the kit

And here is the tag that I made using the kit - the tube is by PIN UP TOONS which you can buy at CDO here
I hope you love tagging with this kit - or creating layouts as much as I do ♥

Thursday, June 28, 2012

Carlos Reis Extras

My mojo has been well hidden this last week ... so I managed to make a tag set to share

I used the awesome tube PINUP KRISTY by CARLOS REIS which you can find here at the PSP PROJECT

The kit is also coming to the PSP Project - called  DANCER
I will provide a link as soon as it's loaded to the store.

Enjoy - you know the rules about snagging! LOL


Friday, June 22, 2012

SteamPunker Clucter Freebie

Time to round out the working week with a new Cluster Freebie for you
This time I used the SteamPunkers Kit by Nicky from InzpiredCreations which you can buy at Scraps and The City here
Preview of the kit

Time for a Preview of the new Cluster

And this is my finished tag - simply added a mask and the wonderful art of
Igolochka - love the tube!


Wednesday, June 20, 2012

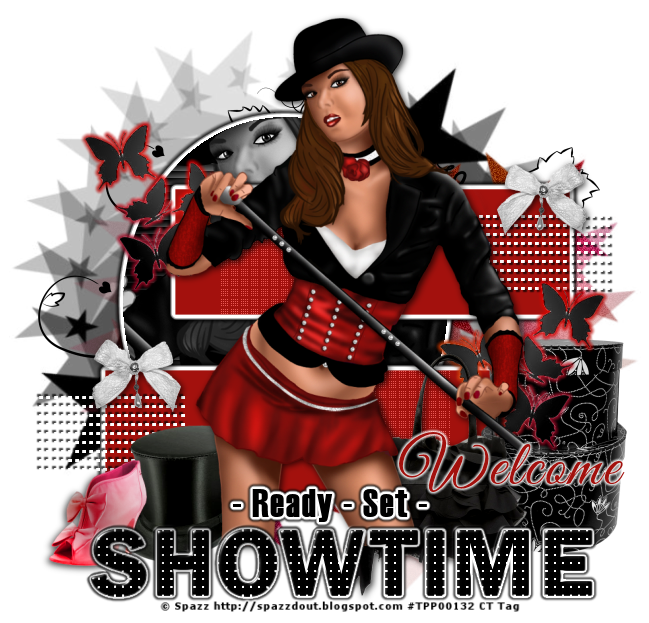
Spazz SHOWTIME Extras

And another set of extras from me today
This time I have used the gorgeous VICKY Tube by SPAZZ which you can buy at the PSP Project here

Enjoy - and remember - no altering of tags or claiming as your own work


Enjoy ... I'll be back with more as soon as I can

Jenna-Lee MILITARY MAMA extras

My newest set of Extras for you to snag.

This time I am using the exceptional art (!) of Jenna-Lee, and the tube is called Sharni which you can buy here at the PSP Project

The kit I used is by Sam's Scraps called Military Mama - you can also buy it at the PSP Project here

You know the drill by now - save to your own pc, do not alter or rip apart, or claim as your own work


Make sure you check out all the other amazing tubes by Jenna-Lee - she has some gorgeous tubes just waiting to be tagged ♥