Wednesday, February 29, 2012

HARMLESS (PTU)

This tutorial was written by me on February 29th 2012, and is
entirely my own work.
Any resemblance to other tutorials/designs on the net is
purely conincidental.
Please do not rip this tutorial apart or claim it as your own work.

This tutorial is done in PSP 9 but maybe done in other versions as
well. A basic understanding of the program and it's tools is needed.


SUPPLIES
Tube of choice. I am using a tube from Ismael Rac (Coolish Girl) which
can be purchased here http://store.xeracx.net/
this tut works well
with a close up of your tube as well.

The kit is from Inzpired Creations called Always Anarchy which you can
get here http://www.scrapsandthecity.com/store/

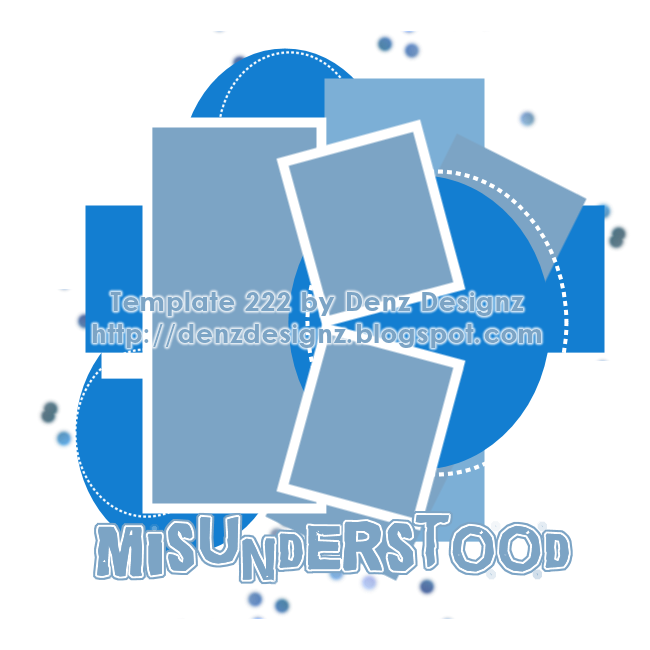
My Template # 223 which you can find here
http://denzdesignz.blogspot.com.au/2012/02/template-223.html

PLUG INS : Eye Candy Gradient Glow


LET'S GET STARTED

Open up your template in PSP ... duplicate and close out the original.
Delete the top layer (Credit to Denz Designz)

Open your tube - copy and paste as new layer, moving down below the
small wordart layers.

Open up your close up tube - copy and paste as a new layer, and move
this layer down to below the right frame layer. Using your magic wand,
move to the right frame back layer, and click anywhere outside the
shape, and then with the marching ants showing, move back to your close
up tube layer and hit delete. Change the blend mode on the tube layer
to Luminance Legacy.

Repeat the same with the left frame and back layers - so you will have
close up images showing through both the frames.

FRAME LAYERS - Add a gradient glow in color of choice - size 8.68
FRAME BACKS - Effect/Texture Effects/Blinds - Size 4, Opacity 43, Color
White

Open Guitar element - copy and paste as new layer, resize by 55% and
move down to the right so the guitar is below the small wordart layer.

Open Glitter 1 - copy and paste as new layer, and drag this layer below
your tube layer, and to the left.
Open Cuffs element - copy and paste as new layer, resizing by 22%. Move
to the left, then duplicate and mirror image and flip.

Open Hat element - copy/paste and resize by 28% .. move down and to the
left. Open the Lips 1 element, butterfly and flower 4 elements -
copy/paste, resize by 28% and place - look at my tag for guides.
Open Disco Ball element - copy/paste - do not resize. Move this layer
down to the bottom.

Open Paper 8. Copy and paste as new layer, and move it down to sit
above the left circle. Resize by 66%. On the circle layer, take your
magic wand and click anywhere outside the circle, and with the marching
ants showing, move up to the paper layer and hit delete. Add the same
gradient glow to the paper. Repeat for the right circle. You can delete
the original circle layers.

Copy and paste the same paper above the wordart layer. Resize by 77%
Using your magic wand again, click anywhere outside the wordart, then
move up to the paper layer and delete.

Move to black strip layer - and add the same gradient glow - color
white.

Move to white strip layer - and add the same gradient glow - color
black.

Move to black circle - and add Effects/Texture/Weave - with these
settings 2,6,1, Fill Gaps, Color White

Move to white circle - add the same gradient glow - color black

Now choose your font - and add your name.
Add your copyright information and you are done!

Tuesday, February 28, 2012

Template 223

I've been really slacking on the templates lately ... so trying my hardest to get back into
making them as I feel the urge ... lol

Here's the latest one ... don't even know what inspired the wordart


FOLLOW ME Extras ♥

Good Morning - I have this set of Extras for you today
using an awesome kit by Creative Intentionz called FOREVER TWILIGHT
which you can purchase here

Kits by Creative Intentionz are on sale right now at 50% off
so make sure you head on over and snap them up :)

Extras - Snag away, just don't alter them in any way - thanks
I love this kit so much, I think there will have to be a tutorial to follow :)


Monday, February 27, 2012

Template 222

WOW - hard to believe that February is nearly over
Finally managed to get another template made - feels like it's been awhile lol

PREVIEW


Friday, February 24, 2012

Spotlight Artist : Erica Leigh Currey

SPOTLIGHT ARTIST at The PSP Project is
ERICA LEIGH CURREY

You can find her gorgeous tubes THE PSP PROJECT
And here is a set of Extras that I made with the beautiful Snowflake Fairy tube

Head on over now and take advantage of her discounted tubes


Monday, February 20, 2012

BIG HUGS (FTU)


This tutorial was written by me on February 20th 2012, and is
entirely my own work.
Any resemblance to other tutorials/designs on the net is
purely conincidental.
Please do not rip this tutorial apart or claim it as your own work.

This tutorial is done in PSP 9 but maybe done in other versions as
well. A basic understanding of the program and it's tools is needed.

SUPPLIES

Victoria by Lilith Morana which you can buy at The PSP Project
http://www.thepspproject.com/index.php?main_page=product_info&cPath=17_82&products_id=525

Doodle flowers by Lori here
http://doodlesfrommynoodle.blogspot.com.au/search?updated-max=2011-07-29T14:27:00-07:00&max-results=7

PLUGINS : PENTA Dot & Cross, EYE CANDY HSB Noise and Gradient Glow

FONT : Lima Bean

MASK of choice ( if desired)


LET'S GET TAGGING

Open a 650 x 650 transparent image

Copy and paste your tube, resizing by 55% - sharpen. Move to the right
of the tag.

Choose a color from your tube,(I used #f2dd94) and making it your
background color, draw out a small rectangle. Drag this layer down
beind your tube. Rename this layer REC 1

Choose another color from your tube (I used #9f9369) and making it your
background color, draw out a circle. Rename this layer CIRC 1. Make
sure this layer sits below your tube layer, and showing from behind her
head.

Now choose another color from your tube (I used #7a644a) and draw out 3
small thin rectangles, they don't have to all be the same size. Convert
to raster layer. Rename this layer REC 2. Add Effects, Texture, Blinds
and a drop shadow/gradient glow.

Once more, choose a color from your tube (I used #a2a191) and draw out
another small circle. Move this layer down below the tube, and to the
left of the tag. Rename this layer CIRC 2

Choose one of the colors you have already used, and draw out a vertical
rectangle. Drag this layer down behind all the others, and to the left
so it is showing. Rename this layer REC 3

Now choose another color you have already used and draw one more
vertical rectangle, moving down below REC 3, but showing out from the
left. Rename this layer REC 4

Now - move back to REC 2 layer and apply HSB Noise with default
settings, changing Lump Width and Height to approx 100. Random seed
until you find the one you like. Then add Penta DOT & CROSS default
settings. Add a drop shadow or gradient glow

Move back to CIRC 1 layer, and copy/paste your tube again, resizing by
44% this time. Position the tube so it sits nicely in the circle. Using
your magic wand, and making sure you are on CIRC 1 layer, click
anywhere outside the circle - then move to the tube you just placed,
and hit delete, Then Selctions, None. Lower the opacity of this tube
layer to 50%. CIRC 1 layer can have a drop shadow/ gradient glow or
both added to it now.

Move to REC 1 layer and apply ZERO FRITILLARY with these settings -
5,30,57,179. Apply a Gradient Glow in your chosen color, width 3 ...
apply twice.

Move to CIRC 2 layer - go to EFFECTS, TEXTURE, WEAVE with these
settings - Gap 2, Width 6, Opacity 1, Colors White. Add a drop shadow
and/or gradient glow if desired.

Move to REC 4 and apply HSB Noise with settings used earlier. You now
add your Gradient Glow.

Font : Lima Bean Size 48 - Type out Big Hugs. Place on tag, add a
Gradient Glow of White - size 5. Add a drop shadow if desired.

Choose your doodle flower - copy and paste as new layer ... moving
around until you are happy with the placement. Colorize to match your
tag.

Now is the time to apply your mask/background if you want one.

Add your copyright information, and your name - and save as a PNG file.


STAND OUT (PTU)

STAND OUT (PTU)

This tutorial was written by me on February 20th 2012, and is
entirely my own work.
Any resemblance to other tutorials/designs on the net is
purely conincidental.
Please do not rip this tutorial apart or claim it as your own work.

This tutorial is done in PSP 9 but maybe done in other versions as well. A basic understanding of the program and it's tools is needed.

SUPPLIES

I am using a sexy tube by Kiwifire Storm (Brian Gibbs) called Sexy Fishnets, which you can buy from The PSP Project here http://www.thepspproject.com/index.php?main_page=product_info&cPath=17_76&products_id=583

Sexy Silhoutte png's from Soxsational Scraps here
http://soxsationalscraps.blogspot.com.au/2012/02/sexy-silhouettes-freebie.html

The kit used is called ROCK THE ATTITUDE by A Space Between, which you can buy here http://berrysweetscraps.com/shop/index.php?main_page=index&cPath=2_132

Plug- Ins : Mura Meisters Copies, Eye Candy HSB Noise and Gradient Glow

Mask : Insatiable Dreams # 59 here http://insatiabledreams.net/Cat_s_Masks.html

Fonts :

Let's get Tagging

Open a 650 x 650 transparent image

Choose a color that compliments your tube and make this your background color. I used #b91a85. Using your rectangle tool, draw out a oval. Check out my tag to get the size. Place in the centre of your canvas

Now using your text tool, Verdana Size 11 BLACK, type out the words STAND OUT.Apply Mura Meisters COPIES with the default settings, changing  Tile Gap to 2 and the mode to TILING.

Now move back to your oval shape, and using your magic wand, click anywhere outside the oval, and you should end up with the 'marching ants around your oval shape, and the edge of your canvas. Move back to your text layer, and hit delete. The wording will now be placed inside your oval shape. Sections, Select None.

Now you can apply any effect you like to your shape - HSB Noise, Fritillary - whatever - it's up to you. I added HSB Noise, and then a gradient glow around mine. Merge the text layer down.

Opne your Sexy Silhouettes - and copy and paste each one onto your canvas, resizing by 22% and placing in a line - you choose the order. Once you have them placed in the order you like, add a Fat White Gradient Glow around each one (width of 3) and then a drop shadow.Merge the silhouttes to one layer and rezize by 77%

Now to your kit
Open Element 65 (music notes) and copy and paste as a new layer. Move this down to the bottom of the tag, and to the left. Move this layer down below your silhouettes.

Open element 73 (guitar) copy and paste as new layer. Move to the right of the tag, add a gradient glow around the guitar.

Open element 10 (feather) and colorize to match your oval shape, and sit this to the right, below your guitar.

Open element 57, copy and paste as new layer, colorize and place it to the left of the tag.

Feel free to add any other elements you like from the kit - placing them on the tag - but remember, sometimes, it's best to keep it simple.

Open your tube. Copy and paste as a new layer, and resize by 66%. Sharpen. This is now your top layer. Apply a drop shadow if you like.

Move to your bottom layer, and floodfill with #b91a85, and apply your mask. I then added another layer, floodfilled with black and applied the same mask, then rotated it to the right. I then added Effects, Textures, Blinds to both mask layers.

Add your copyright information .. making sure that it can be ready clearly and your licence number is also on the tag.

Using your font of choice - add your name, and save as a PNG File

Tuesday, February 14, 2012

LOVE Wordart

It's Valentine's Day ... so what better way to celebrate it with a new piece of Word Art

SAAD Snow White Extras

SAAD is the Spotlight Artist at the The PSP Project

Click on the tags below to grab these extras at full size


Friday, February 10, 2012

Midnight Siren (FTU)

(Click on image to see larger size)
This tutorial was written by me on February 10th 2012, and is
entirely my own work.
Any resemblance to other tutorials/designs on the net is
purely conincidental.
Please do not rip this tutorial apart or claim it as your own work.

This tutorial is done in PSP 9 but maybe done in other versions as 
well. A basic understanding of the program and it's tools is needed.
Use your own choice of Drop Shadow .. as I won't mention it unless it's 
relevant to the finished tag.

And above all ... remember this tutorial and all others over the net 
are guidelines. Make each tag your own, unique and original to you by 
tweeking here and there.

SUPPLIES

I am using this beautiful tube by Steve Baier called SURF'S UP which 
you can buy at UP YOUR ART www.upyourart.com. Thanks Steve for your 
brilliant artwork ...

A kit called GOING DEEP by Wicked Princess Scraps. It was originally 
PTU but is now a FTU freebie. Grab the kit here 

Mask of Choice - I am using ArtMama's Mask 10 
Font - Ephesis

LET'S GET STARTED :)

Open up a new 650 x 650 transparent image.

Copy and paste your tube as a new layer - moving to the left. Resize by 
85% and adjust sharpness

Copy and paste Paper 10 from the kit. Resize by 80%
Apply your mask (which I am sure you all know to do by now) and then 
drag this layer down below your tube layer. Now go to Effects, Texture 
Effects Blinds with these settings
WIDTH 3 OPACITY 39 Horizontal and Light from Left/Top both checked.
(I also added the image that came with the tube, and applied the mask 
and the Texture Effect to it, and moved this above the Mask layer)

Element Cat Tails - copy and paste as a new layer and resize by 80%. 
Move this layer to the left so it is showing from behind our Tube Layer

Element Grass - copy and paste as a new layer and resize by 66%, moving 
this so it sits above the cat tails layer.

Element Bottle - copy and paste as a new layer and resize by 33%, and 
mirror image. Have this showing out from behind the tube.

Element Bird 2 - copy and paste as a new layer and resize by 22%. 
Position where you like on the tag

Element Sand Doodle - copy and paste as a new layer and resize by 33%. 
Move this so it is showing from behind the Bottle. I also colorised 
this to match the tube.

Element SailBoat - copy and paste as a new layer and resize by 44%. 
Lower opacity to 68 and move to the right.

Element Wave Flowers - copy and paste as a new layer and resize by 44%. 
Move this layer down so it sits above your mask layer, but over to the 
left, showing from behind the Artist's tube. 

Element Glitter Cloud - copy and paste as a new layer, and resize to 
57%. Recolor to suit your tag ..

Element SandSpill 7 - copy and paste as a new layer, arranging so this 
is your top layer. Lower opacity to 80 and move slightly to the right.

Now it's time to get creative and add any other elements you would like 
BUT I wouldn't over do it .. keep this simple - LESS IS MORE :)

Add your Copyright Information, and your name and save this as a PNG 
File.
ANIMATION ... if you wish ... you can add a couple of stars in the 
background


CALL OF DUTY (PTU)


This tutorial was written by me on February 10th 2012, and is
entirely my own work.
Any resemblance to other tutorials/designs on the net is
purely conincidental.
Please do not rip this tutorial apart or claim it as your own work.

This tutorial is done in PSP 9 but maybe done in other versions as 

well. A basic understanding of the program and it's tools is needed.
Use your own choice of Drop Shadow .. as I won't mention it unless it's 

relevant to the finished tag.

SUPPLIES

Tube of choice .. I am using the artwork of Elias Chatzoudis .. and you 
can buy this tube at PTE http://psptubesemporium.com/

The kit is a PTU kit from Sam's Scarps called Military Mama which you 
can buy at the PSP Project http://www.thepspproject.com/

PlugIns : Eye Candy HSB Noise and Gradient Glow, Mura Meisters Copies

Fonts : Birth of a Hero


Let's Get Started :)

Open a new 650 x 650 image - you can always resize later
Open up your tube - copy and paste as new layer. (We are doing this now 
so we have the tube and can check the position of elements etc.) 

Copy and Paste Paper 12 as a new layer and resize by 77%. Adjust 
Sharpness. Using Mask of choice, go to Layers, New Mask Layer, from 
Image. Layers, Merge Group. Then add Effects, Texture Effects, Blinds.

Element Glitter Splat 1 - copy and paste as a new layer, resize by 44% 
and move to the left. Duplicate and mirror. Duplicate and flip and move 
to the centre bottom of the tag.

Choose a color from your tube, I used #6a743f and make this your 
background color. Using your Elipse Shape Tool draw out a circle, 
checking the size to match my tag.

Now change your background color to White and draw another circle - 
slightly bigger than the one you already have. Drag this layer down 
below the colored circle you already have.Add a Gradient Glow.

Now choose a close up of your tube, and copy and paste this as a new 
layer, placing the layer above the colored circle. Move this tube 
around until you have it sitting where you like.

Using your magic wand, click anywhere on the circle 1 layer, then move 
up to your tube layer and hit delete. Your tube will now be showing 
sitting in the circle. Change Opacity to 56 and Blend Mode to Overlay 
or whichever mode you like.

Element Hanging Hearts - Copy and paste as new layer, and resize by 55% 
and place on top of the colored circle. 

Element Postcard - Copy and Paste as new layer and resize by 44%.
Move to the right and using the Raster Deform tool, rotate slightly so 
it sits at an angle. You can add whatever wording you like to this or 
leave it blank.

Element Truck 1 - Copy and paste as new layer and resize by 77%, 
placing to the bottom of the circle shapes.

Element Basket - Copy and Paste as new layer and resize by 30%. Sit 
this in front of the truck's door.

Element Canteen - Copy and Paste as new layer and resize by 30%. Sit 
this next to the basket.

Element Dog Tags - Copy and Paste as new layer and resize by 30%. Move 
this down the tag and to the right of your tube. Adjust Sharpness.

Element Barbed Wire - copy and paste as new layer and resize by 44%. 
Make this layer sit above your tube layer.

Now - Free Choice - go through and add any other elements that you like 
... make this tag your own and play around - there are so many elements 
in this kit to choose from.

Using your font of Choice ... I used BIRTH OF A HERO, type out CALL OF 
DUTY in size 72. Add any effects you desire, and place at the bottom of 
the tag.

Add your copyright information - making sure you can read it clearly.
Add your name, and save as a PNG file.


Tuesday, February 7, 2012

WISHFUL MEMORY (FTU)

WISHFUL MEMORY (FTU)


This tutorial was written by me on February 7th 2012, and is
entirely my own work.
Any resemblance to other tutorials/designs on the net is
purely conincidental.
Please do not rip this tutorial apart or claim it as your own work.

This tutorial is done in PSP 9 but maybe done in other versions as well. A basic understanding of the program and it's tools is needed.

Please note : explore your creativity when doing tuts - it's the only way to get your tag as an extension of you. If you like, add your own effects ... don't use all the elements I did ... tutorials are just a guideline.

SUPPLIES NEEDED :

I am using a tube by Charlie called LOOKING AWAY which you can purchase at The PSP Project http://www.thepspproject.com/
You need a licence to use this tube

Kit I am using is from Wicked Princess Scraps called a Little Birdie Told Me which you can get here http://wickedprincessscraps.blogspot.com.au/2011/08/freebie-alert-ftu-little-birdy-told-me.html which is a FTU Kit

Filters : Eye Candy HSB Noise and Gradient Glow
Toadies Posterize

Fonts : Century Gothic
Carpenter


Let's Get Tagging

Open up a 650 x 650 transparent image.
Copy and paste your tube as a new layer (we will do this now to act as a guideline) Resize image by 77%

Now onto the kit
Open up Frame 5 - copy and paste as new layer. Resize by 77% and move so the tube is showing through the frame. Using your magic wand, click inside the frame, then go to Selections, Modify, x 9 and Invert. Move to the tube layer and hit delete.

Selections Invert, then add a new layer and drag this below the tube layer. Using color #605d60, flood fill this area. Selections, Select None. Apply HSB Noise - using default settings, changing the Lump Width and Height to approx 100. I then used Toadies Posterize with default settings.

Open Element Bird 3 - copy and paste as new layer. Image resize by 66%, then mirror image, and move to the left hand side of the frame. Adjust Hue & Saturation with these settings
COLORIZE: HUE 4 and SATURATION 0

Opene Element Sand Sprinkly - copy and paste as new layer. Duplicate image, and mirror. Layers, Merge Down. Colorize with the same settings as before. Move this layer down, so it is the bottom layer.

Open Element CallaLily - copy and paste as new layer. Resize by 66% and move to the left of the frame, sitting it behind the bird. Colorize with the same settings as before.

Open Element Fence - copy and paste as a new layer. Resize by 63%, and move this so it sits at the bottom of the frame. Colorize as before.

Open Element Flower 2 - copy and paste as a new layer. Resize by 63% and move this to the right of the frame. Colorize as before.

Open Element Flower Spray - copy and paste as a new layer. Resize by 63% and move this to the bottom of the tag. Colorize as before.Adjust Opacity to 74%

You can add any sparkles/twinks etc that you like. I found this butterfly spray in my collection but have no idea where I got it from, so can't point you in the direction to get it - SORRY :(

Using Century Gothic - type out the words WISHFUL MEMORY in black - add a Gradient Glow and postition towards the bottom of the tag.Convert to Raster Layer.
Now - using Carpenter Font Size 48, and color white - type the same words ... and lay them over the top of the wording already there. Add Gradient Glow. Convert to Raster Layer.

Now add your name - in the same way ...

Add your Copyright Information, making sure that it can read clearly.

Save as a PNG File. ♥


Euphoic Danger (FTU)


EUPHORIC DANGER


This tutorial was written by me on February 7th 2012, and is
entirely my own work.
Any resemblance to other tutorials/designs on the net is
purely conincidental.
Please do not rip this tutorial apart or claim it as your own work.

This tutorial is done in PSP 9 but maybe done in other versions as well. A basic understanding of the program and it's tools is needed.

Please note : explore your creativity when doing tuts - it's the only way to get your tag as an extension of you. If you like, add your own effects ... don't use all the elements I did ... tutorials are just a guideline.


SUPPLIES

I am using a gorgeous tube by Wendy Gerber called Euphoria which you can purchase at The PSP Project http://www.thepspproject.com/ You need a licence to use this tube.
(This tut works best with a tube that also has a close up)


Filters Used : Eye Candy HSB Noise and Gradient Glow
Zero Fritillary

Scrapkit used : Dream E-scape by Kirsty Scraps


LET'S GET TAGGING

Open up your template in PSP ... SHift + D to duplicate the template, and close out the original. Delete the Vector 1 layer

Go to Image, Canvas Size - and resize to 650 x 650
You can always resize your tag when finished. I like to work on this size.

Open up your tube - copy and paste as a new layer.

Copy and paste the close up of your tube on the grey ractangle layer. Position the tube so you can see the face clearly. Now using your magic wand, click inside the grey rectangle, go to Selections, Invert and hit delete. Selections, Select None.

Choose a color from your tube ... and floodfill the grey rectangle with the chosen color. Now add HSB Noise Effects ... with the default settings but changing the Lump Width to 99 and the Height to 122.

Now move down to the pink rectangle and floor fill this layer with Black. You can add a Gradient Glow (Fat) white and then a Medium Glow (Black) - both with a width of 3, if you like.

Move down to the left Grey Circle and add the following effect
ZERO FRITILLARY with these settings 
Granularity 5
Aggresion 30
Tesselation 70
Variation 197
Add the same Eye Candy Gradient Glow to this circle.

Now move to the Right Circle and repeat these steps.

Now - move to the right Grey Rectangle,flood fill with color of choice and copy and paste your close up tube once again. Make sure that the eyes are the focal point, when placing the tube. Back on the rectangle layer, use your magic wand to click inside the rectangle and go to Selections, Invert. Move back to your tube layer and hit delete.
Move to right Glitter Rectangle and add a gradient glow (Medium - Black - Width 3)

Move to the left Grey Rectangle, and flood fill with color of choice. Add effects if desired.
Move to left Glitter Rectangle and add a gradient glow (Medium - Black - Width 3)

On the right and left PINK dotted lines layers, change to a color to match your tube.

Now it's time to add any elements you would like. This is what I did
Element SCATTER ... copy and paste as new layer and drag to the bottom. Moved up to the right and then changed the color to suit my tube/tag by going to Adjust, Hue & Saturation, Colorize. Play around with the settings until you get it right for your tag. Then duplicate, image and mirror this layer and move down to the bottom left.

Element Glitter Stars - copy and paste, resize by 90%. Colorize.

Element Flower 4, Greenery 1, Leaves 2 and both Butterfly elements ... gives just the right amount of beauty to the tag.

Now you can add a mask layer if you like, make sure to make it the bottom layer of the tag.

Add your Copyright Information, making sure it can be read clearly.
Add your name and save in PNG Format.

You're done!

Thursday, February 2, 2012

Sweet Tease (PTU)


This tutorial was written by me on February 2nd 2012, and is
entirely my own work.
Any resemblance to other tutorials/designs on the net is
purely conincidental.
Please do not rip this tutorial apart or claim it as your own work.

This tutorial is done in PSP 9 but maybe done in other versions as 
well. A basic understanding of the program and it's tools is needed.

SUPPLIES

Tube of choice .. I am using the sweet tube by Elias Chatzoudis called 

Strawberry Tease (Limited Edition Tube) at PSP Tubes Emporium.You can 
(This tutorial works well with a tube that is sitting or kneeling)

The kit is a PTU Kit by A Space Between called SUMMER BERRIES. You can 
find the kit here 
r-berries.html - Mirella is now selling at Berry Sweet Scraps 
Thank you Mirella for your brilliant kits.


PlugIns : Eye Candy HSB Noise and Gradient Glow

Fonts : Saginaw

Let's Get Started :)

Open a new 650 x 650 image - you can always resize later

Element 50 - Copy and paste as a new layer. Using your magic wand, 
click inside the frame, then go to Selections, Modify, Expand by 5. Add 
a new layer, and fill this section with a color of choice. Now add the 
Eye Candy HSB Noise effect with these settings : Default Settings but 
change the Lump Width and Height to 100. 

Copy and paste a close up of your tube to this new layer, cropping to 
fit this layer without any parts hanging outside. Lower the opacity to 
52%. 

Add a drop shadow to the frame with these settings : 2,2,40,100

Element 43 (leaves frame) copy and paste as new layer.Add a drop shadow 
with these settings : 2,2,40,100 

Element 36 (strawberry stack) Copy and paste as new layer. Move this so 
it is sitting to the left, on top of the leaf frame.

Element 27 - Copy and paste as anew layer. Resize by 44%, and move down 
behind the strawberry stack so it is still showing.

Element 8 - Copy and paste as new layer. Resize by 44%, and mirror this 
element - move to the right slightly.

Element 10 - Copy and paste as new layer. Resize by 22% and move this 
so it sits in front of the bucket and to the right.

Element 45 - copy and paste as new layer. Resize by 77% and place where 
desired.

Element 22 (berry basket) Copy and paste as new layer, and move this so 
it is sitting in front of the strawberry stack.

Element 1 - Copy and paste as a new layer, and move to the centre top 
of the leaf frame.

Now add your tube, and place her so she is sitting on the strawberry 
stack. Add a drop shadow of 3,3,40,100.

MASK (Optional)

Add your Copright Information and your name, and save as a PNG File.


Beautiful Rain (FTU Limited Time)


This tutorial was written by me on February 1st 2012, and is
entirely my own work.
Any resemblance to other tutorials/designs on the net is
purely conincidental.
Please do not rip this tutorial apart or claim it as your own work.

This tutorial is done in PSP 9 but maybe done in other versions as well. A basic understanding of the program and it's tools is needed.


SUPPLIES

Tube of choice .. I am using the beautiful tube by Akubaka called Beautiful Oblivion which you can purchase at The PSP Project.You can find it here http://www.thepspproject.com/

The kit is a FTU add on (Limited Time) by Fanette Design called Rain Over Me, which you can download here http://digital-crea.fr/shop/index.php?main_page=product_info&cPath=1&products_id=8769 - this kit is just gorgeous.

PlugIns : Eye Candy HSB Noise and Gradient Glow
Fonts : Carpenter and Haettenschweiler


Let's Get Started :)

Open a new 650 x 650 image - you can always resize later
Open up your tube - copy and paste as new layer. (We are doing this now so we have the tube and can check the position of elements etc.)

Now back to the kit :
Open Element 16 - copy and paste as new layer, resize by 55% and rotate to the left by 90degrees.
Click inside the frame with your magic wand, Selections, Modify by 5, Selections Invert.
Move down to your tube layer and hit delete, making sure your tube is sitting exactly how you like inside the frame.

Selections Invert again, and then make a new layer, and fill with a color from your tube. You can also use a paper from the kit if you like. I added HSB Noise effects to this layer. Move this layer down below your tube layer.

Open Element 33 - copy and paste as new layer. Resize by 22% and move to the right of the frame.

Open Element 26 - copy and paste as new layer. Resize by 18% and move to the right of the frame ... moving down below the stump element.

Open Element 28 - copy and paste as new layer. Resize by 22% and place in front of the frame.

Open Element 27 - copy and paste as new layer, resizing by 22%, and moving to the left of the frame.

Open Element 18 - copy and paste as new layer, resizing by 22%, and moving to the left of the frame.

Open Element 25 - copy and paste as new layer, resizing by 22%, and moving to the left of the frame, dragging this layer down so it sits behind the bucket.

Open Element 4 - copy and paste as new layer, resizing by 22% and moving to the left, sitting the lamp in front of the stump.

Open Element 29 - Copy and paste as new later, resizing by 22% and lowering the opacity of the layer to 44.

Open Element 17 - copy and paste as new layer, resizing by 22%. Make this layer your top layer. I added HSB Noise to the ribbon element as well.

Be creative ... this tut is only a guide so feel free to add any other elements you like to finish off your tag.

Add a new layer and floodfill with a color from your tube. Using your mask of choice, apply the mask (Layers, New Mask Layer, from image. Merge Group).

Add your Copyright Information, and your name and save as a PNG file.

As always, I would love to see any tags you make from this tutorial.

Happy Tagging.


Tutorials from Templates

You are in for a treat - here are some more tutorials using my templates

DID YOU KNOW ME?

SPARKLING VALENTINE

RED HOT LOVER

HAPPY NEW YEAR

VANITY

Thank you ladies for making some rocking tags with my templates